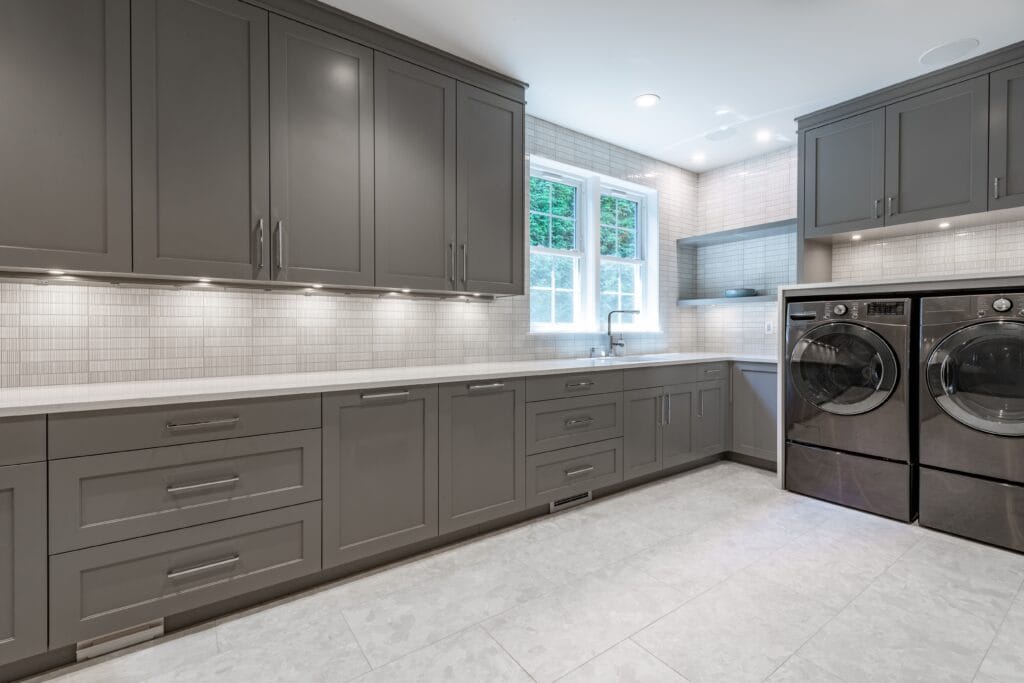
Transform your dim laundry space into a well-lit workstation with under cabinet lighting. Whether you’re treating stains, sorting clothes, or organizing supplies, proper lighting makes every task easier. In this comprehensive guide, we’ll walk you through everything you need to know about installing under cabinet lighting in your laundry room.
Table Of Content
- Types of Under Cabinet Lighting
- LED Strip Lights
- Puck Lights
- Light Bars
- Essential Tools and Materials
- Tools Needed
- Materials Required
- Pre-Installation Planning
- 1. Measure Your Space
- 2. Power Source Options
- 3. Location Planning
- Step-by-Step Installation Guide
- For LED Strip Lights
- For Hardwired Fixtures
- Troubleshooting Common Issues
- Dim or Flickering Lights
- Uneven Lighting
- Connection Problems
- Maintenance Tips
- Regular Maintenance
- When to Replace
- Smart Upgrade Options
- Safety Considerations
- Conclusion
- Pro Tips
Time Required: 2-4 hours
Skill Level: Intermediate
Cost Range: $50-$200
Types of Under Cabinet Lighting
Before diving into installation, let’s explore your under cabinet lighting options. Each type has its unique benefits for laundry room applications:
LED Strip Lights
- Pros: Flexible, easy to install, low profile
- Cons: May require cutting/soldering
- Best For: Long, continuous cabinets
- Average Cost: $20-$50
Puck Lights
- Pros: Strong focused light, battery options available
- Cons: Potential spotting effect
- Best For: Specific task areas
- Average Cost: $30-$80
Light Bars
- Pros: Professional appearance, consistent lighting
- Cons: Higher cost, more complex installation
- Best For: Permanent installations
- Average Cost: $50-$150
Essential Tools and Materials
Tools Needed:
- Measuring tape
- Pencil
- Wire stripper/cutter
- Drill with bits
- Screwdriver set
- Level
- Utility knife
- Voltage tester
- Safety glasses
- Work gloves
Materials Required:
- Under cabinet lighting of choice
- Mounting hardware (included with lights)
- Wire connectors
- Cable clips
- Electrical tape
- Junction box (if hardwiring)
- Power supply/transformer (for LED strips)
Pre-Installation Planning
1. Measure Your Space
Start by measuring the length of your cabinets and determining:
- Total linear feet needed
- Number of separate cabinet sections
- Distance to nearest power source
- Height of backsplash (if any)
2. Power Source Options
Choose between:
- Plug-in: Simplest installation, but visible cord
- Battery-operated: Most flexible, requires regular maintenance
- Hardwired: Cleanest look, requires electrical knowledge
3. Location Planning
- Mark mounting positions
- Plan wire routes
- Identify power source location
- Consider switches and control placement
Step-by-Step Installation Guide
For LED Strip Lights
- Preparation
- Clean under cabinet lighting surface thoroughly
- Plan exact strip placement
- Test LED strip before installation
- Locate the power outlet or junction box
- Power Supply Installation
- Mount transformer inaccessible location
- Route power cable to first light location
- Secure the cable with clips
- Leave slack for connections
- LED Strip Mounting
- Remove the backing from the LED strip
- Start at the power supply end
- Press firmly while installing
- Cut only at marked points
- Use connectors at corners
- Secure any loose sections
- Making Connections
- Connect strips to the power supply
- Secure all connection points
- Test before finalizing
- Add cable management clips
For Hardwired Fixtures
- Safety First
- Turn off the power at the breaker
- Verify power is off with a voltage tester
- Remove existing fixtures if present
- Junction Box Installation
- Mark junction box location
- Cut opening if needed
- Mount box securely
- Route power cable
- Fixture Mounting
- Mark mounting points
- Pre-drill if needed
- Install mounting brackets
- Secure fixtures
- Wiring Connections
- Strip wire ends
- Connect black to black (hot)
- Connect white to white (neutral)
- Connect ground wires
- Secure with wire nuts
- Tuck wires into the box
Troubleshooting Common Issues
Dim or Flickering Lights
- Check the power supply rating
- Verify connections
- Ensure proper voltage
- Check for loose wires
Uneven Lighting
- Adjust fixture spacing
- Clean light surfaces
- Check for damaged sections
- Verify consistent power supply
Connection Problems
- Inspect all connection points
- Check for loose wires
- Verify proper wire stripping
- Test power supply output
Maintenance Tips
Regular Maintenance
- Dust fixtures monthly
- Check connections quarterly
- Replace batteries as needed
- Clean light surfaces
When to Replace
- Dimming performance
- Color shifts
- Flickering
- Physical damage
- Failed connections
Smart Upgrade Options
Consider these advanced features:
- Motion sensors
- Smart switches
- Voice control
- Color temperature adjustment
- Scheduling capabilities
Safety Considerations
Always remember:
- Turn off power before hardwiring
- Use proper wire connectors
- Don’t overload circuits
- Follow local codes
- Consider professional help for complex installations
Conclusion
Under cabinet lighting can dramatically improve your laundry room’s functionality and appearance. Whether you choose simple battery-operated puck lights or a sophisticated hardwired system, proper installation ensures years of reliable service. Take your time with the installation, and don’t hesitate to consult a professional if you’re unsure about electrical work.
Pro Tips:
- Install lights slightly back from the cabinet edge to reduce glare
- Use warm white lights for better color rendering
- Consider dimming options for versatility
- Keep spare parts for future repairs
- Document your installation for future reference
Check your local building codes and obtain necessary permits before starting any electrical work. If you’re uncomfortable with electrical installations, please consult a licensed electrician.




![Shiplap Costs Per Square Foot: Proven Expert [2026 Pricing Guide] Shiplap Costs](https://mynexthouseproject.com/wp-content/uploads/2026/01/Shiplap-Costs-550x400.jpg)
