

A thin black line around the tub or a crack where the wall meets the bathtub may look minor, but it can let water behind the surround, drywall, or flooring. That is why learning how to caulk bathtub edges correctly is one of the highest-value small repairs a homeowner can make. Done well, it takes an afternoon, costs far less than repairing water damage, and gives the whole bathroom a cleaner finish. Understanding how to caulk bathtub edges effectively is essential for maintaining your bathroom.
Table Of Content
- Choose the right caulk for bathtub edges
- Gather your supplies before opening the tube
- How to caulk bathtub edges step by step
- Remove every bit of loose or failed caulk
- Clean and dry the joint thoroughly
- Tape the edges for a crisp line
- Apply a steady, continuous bead
- Tool the bead, then remove the tape
- Let bathtub caulk cure before using the shower
- Common bathtub caulking mistakes to avoid
The part that determines success is not squeezing out a perfect-looking bead on the first try. It is removing failed caulk completely, starting with a dry surface, and choosing a sealant made for a wet bathroom.
Learning how to caulk bathtub edges can also prevent mold growth and extend the lifespan of your tub.
Choose the right caulk for bathtub edges
For the joint between a bathtub and tile, a fiberglass surround, or an acrylic wall panel, use a kitchen-and-bath silicone or siliconized sealant labeled mildew resistant. A 100% silicone product usually offers the best long-term water resistance and flexibility. That flexibility matters because tubs, especially acrylic and fiberglass models, can shift slightly when they are filled or someone steps into them.
Selecting the right product is crucial in how to caulk bathtub edges to ensure long-lasting results.
The trade-off is that pure silicone is less forgiving. It is sticky, cannot be painted, and is harder to clean up once it cures. Siliconized acrylic latex caulk is easier for beginners to tool and clean with water, but it generally does not last as long in a frequently used shower. It can make sense around a low-use tub where paintability matters, but it is not the first choice for a busy family bathroom.
Check the tube before buying. It should state that it is suitable for tubs, showers, and wet areas. Clear caulk works well when surrounding tile has variation in color. White is the conventional choice for white tubs and surrounds. Match colored grout only if you can find a bathroom-rated product that closely matches it.
Choosing a caulk suitable for how to caulk bathtub edges is vital for durability.
Gather your supplies before opening the tube
A modest set of tools makes this job much easier:
- Bathroom caulk in a standard 10-ounce tube
- Caulk gun with a smooth, controlled trigger
- Utility knife or caulk-removal tool
- Plastic scraper and needle-nose pliers
- Rubbing alcohol or a bathroom-safe cleaner
- Painter’s tape, paper towels, and disposable gloves
- A small bowl of water and a finishing tool or gloved finger
Avoid relying on a putty knife or metal scraper against an acrylic tub. It can leave scratches that are more noticeable than the old caulk. A plastic scraper is slower but safer.
Knowing how to caulk bathtub edges step by step will ensure a successful project.
How to caulk bathtub edges step by step
Plan to keep the tub dry for at least 24 hours after the repair, unless the caulk label calls for a longer cure time. If possible, start early in the day and make sure everyone in the household knows the shower is temporarily off limits.
This guide on how to caulk bathtub edges will lead you through the essential steps.
Remove every bit of loose or failed caulk
If you’re unsure how to caulk bathtub edges, this section will provide clarity.
Run a utility knife carefully along both sides of the old bead, then pull it out in strips with pliers. Some sections may lift easily, while other areas will come out in tiny pieces. Keep working until the joint is clear.
This step can feel tedious, but new caulk does not reliably bond to old silicone. If residue remains, use a caulk remover designed for bathroom sealant, following its directions carefully. Then scrape again with a plastic tool. Do not gouge grout, cut into a fiberglass surround, or force a blade deep into the joint.
The technique of how to caulk bathtub edges will determine the effectiveness of your repair.
Once the old material is gone, inspect the gap. A narrow, consistent joint is normal. If there is a gap wider than about 1/4 inch, caulk alone may sag or split over time. Press foam backer rod into the joint first, then apply caulk over it. If the wall panel is loose, the tub is visibly moving, or there are signs of soft drywall behind the surround, solve that underlying problem before resealing.
Follow these tips on how to caulk bathtub edges for optimal results.
Clean and dry the joint thoroughly
Soap scum, mildew, and moisture are the main reasons fresh caulk lets go early. Clean the exposed surfaces with rubbing alcohol or a residue-free bathroom cleaner, then wipe them with a clean cloth. Let the area dry completely.
Knowing how to caulk bathtub edges can save you time and money in the long run.
If you see mildew staining, clean it before caulking. Caulk can cover a stain, but it will not fix ongoing moisture or mold behind the wall. A persistent musty smell, recurring stains, or soft material around the tub is a reason to pause and investigate further.
For acrylic or fiberglass tubs that flex noticeably, fill the tub with several inches of water before applying the new bead. The weight puts the tub closer to its loaded position, so the caulk is less likely to pull apart later. This is especially useful on a bathtub that gets regular use. Do not overfill it, and drain it only after the caulk has cured if the product directions allow that approach.
Applying caulk when you know how to caulk bathtub edges can help prevent future issues.
Tape the edges for a crisp line
Tape helps ensure a clean finish when you know how to caulk bathtub edges correctly.
Apply painter’s tape along both sides of the joint, leaving an even channel exposed. A finished caulk bead usually looks best at roughly 1/8 to 1/4 inch wide. Tape is optional for an experienced DIYer, but it is a smart safeguard for a first attempt or for textured tile where cleanup is difficult.
Press the tape down firmly so caulk cannot seep beneath it. Keep a paper towel nearby before moving on. Silicone gives you limited working time, and stopping midway to find supplies can turn a neat job into a messy one.
Apply a steady, continuous bead
A steady hand is crucial in how to caulk bathtub edges effectively.
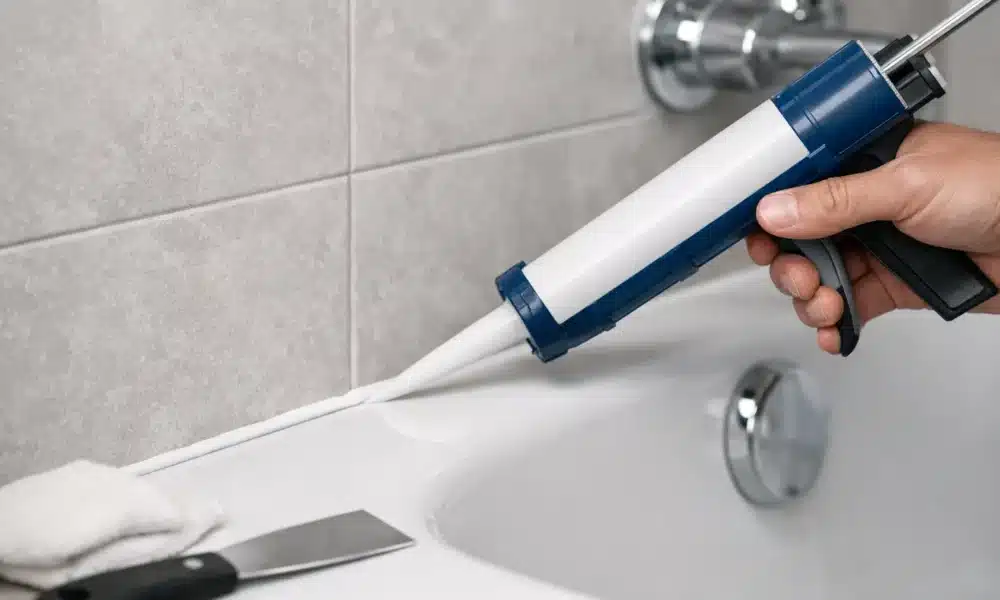
Cut the nozzle at a 45-degree angle, starting with a small opening. You can always trim the opening larger, but a large cut dispenses too much caulk. Puncture the inner seal if the tube requires it, load the tube into the gun, and test the flow on scrap cardboard.
Hold the tip at about a 45-degree angle to the joint and pull the gun steadily along the seam. Many homeowners get better control by pulling the bead toward themselves rather than pushing it away. Use enough material to fill the joint, but do not pile it on. A heavy bead takes longer to tool and tends to look uneven.
Maintain control to master how to caulk bathtub edges seamlessly.
Work in manageable sections if your tub has a long surround. The goal is continuous coverage, but it is better to make a clean overlap than rush and leave a thin spot.
Tool the bead, then remove the tape
Right after applying the caulk, smooth it with a caulk-finishing tool or a gloved finger lightly dampened with water. Use one confident pass with gentle pressure. This pushes caulk into the joint and creates a slightly concave surface that sheds water better than a raised ridge.
After tooling, it’s essential to check how to caulk bathtub edges for perfection.
Wipe excess caulk from the tool or glove often. Repeatedly rubbing the same area can pull material back out of the joint. If a spot looks thin, add a little more caulk and tool it again before it starts to skin over.
Remove painter’s tape immediately after smoothing, pulling it back over itself at an angle. Waiting until the caulk dries can tear the clean edge you just created. Use a damp paper towel to catch any small smears while they are still fresh.
Let bathtub caulk cure before using the shower
Dry-to-the-touch is not the same as cured. Most bathroom sealants need at least 24 hours before water exposure, and some require 48 hours or more depending on humidity, bead thickness, and product formula. Follow the tube, not the clock you wish it had.
Patience is key when learning how to caulk bathtub edges for the best results.
Keep the bathroom ventilated during curing, but do not point a high-powered fan directly at the bead. Rapid surface drying can create a skin before the material settles properly. Once cured, inspect the full perimeter under good light. The bead should be attached on both sides, without pinholes, gaps, or sections that lift when gently pressed.
Common bathtub caulking mistakes to avoid
Avoid the common pitfalls when discovering how to caulk bathtub edges properly.
The most common mistake is applying new caulk over old material. It may look better for a few weeks, but the new layer often separates because it cannot form a dependable bond. Another is caulking over a damp joint. Even a small amount of trapped moisture can shorten the life of the repair.
Using too much caulk is also a problem. Thick, bulbous beads collect grime and are harder to clean. A smaller, well-adhered bead is more durable and looks more professional. Finally, do not use grout in the change-of-plane joint where tile meets the tub. Grout is rigid; caulk is designed to move.
Remember, mastering how to caulk bathtub edges leads to a perfect finish.
A clean caulk line is small work with a big payoff. Treat it as routine bathroom maintenance, and you can protect the finishes behind your tub while keeping one of the hardest-working spaces in your home looking cared for.