



A patio can look finished in a weekend, but the ground beneath it determines whether it still looks good after several freeze-thaw cycles, summer downpours, and years of foot traffic. Learning how to prepare ground for a patio is the part of the project that protects your investment – whether you are installing pavers, flagstone, porcelain tile, or a concrete slab.
Table Of Content
Understanding how to prepare ground for a patio is essential for long-lasting results.
The goal is simple: create a level, well-compacted surface that drains water away from your house. Getting there takes some measuring, digging, and patience with a plate compactor, but it is work most homeowners can handle on a modest patio. Large retaining walls, steep slopes, poor drainage, or patios close to foundations may be better projects for a landscape contractor.
When considering how to prepare ground for a patio, remember that proper drainage is crucial.
Start With a Patio Plan, Not a Shovel
Mark the patio’s finished size with stakes and string before you remove any sod. Think about how the space will actually function. A small bistro set needs far less room than a dining table with chairs that must slide out comfortably. For reference, a 10-by-10-foot patio works for a compact seating area, while a dining setup is usually more comfortable at 12 by 14 feet or larger.
Each patio layout should incorporate knowledge on how to prepare ground for a patio.
Add 6 to 12 inches beyond the planned finished edges. That extra room gives the base material support outside the pavers or slab edge, which helps prevent settling and shifting. It also makes it easier to install edge restraints around a paver patio.
Before digging, call 811 to have underground utilities marked. You should also check local rules for setbacks, drainage requirements, and permits. A ground-level patio often does not require a permit, but regulations vary by municipality, especially when the project connects to a deck, includes electrical work, or changes drainage near a property line.
Set the Correct Slope
A patio should slope away from the house so rainwater does not pool against the foundation. Plan for a drop of about 1/8 to 1/4 inch per linear foot. That means a patio extending 12 feet from the house should fall 1 1/2 to 3 inches from the house-side edge to the outer edge.
Use a long level on a straight board, or set a string line with a line level, to establish the desired pitch. Do this before excavation, then keep checking it as you build the base. A patio can appear level to the eye while still holding water after a storm.
Calculate How Deep to Excavate
Different surfaces necessitate understanding how to prepare ground for a patio effectively.
The excavation depth depends on your finished surface and local soil conditions. Measure down from the height you want the patio to end up, not from the existing ground level. Pavers should generally finish slightly above surrounding soil so water can move away freely instead of washing dirt onto the surface.
For a typical paver patio, plan for the paver thickness, about 1 inch of bedding sand, and 4 to 6 inches of compacted crushed-stone base. In much of the northern US, where frost heave is a concern, a 6-inch compacted base is the safer choice. If you have heavy clay soil, poor drainage, or expect vehicle traffic, you may need more base depth.
When designing a paver patio, learning how to prepare ground for a patio should be your first step.
A concrete patio usually needs a 4-inch slab over 4 to 6 inches of compacted granular base, though local code and site conditions can change that requirement. Natural flagstone can be laid on a compacted base with stone dust or sand, but irregular pieces require more finish work than uniform pavers.
Do not assume a 6-inch-deep hole will hold a 6-inch base. Granular base material shrinks as it compacts. Buy enough material to account for compaction, typically 10 to 20 percent more than the final compacted volume. A local landscape supply yard can help calculate cubic yards when you provide your patio dimensions and planned base depth.
Excavate and Prepare the Subgrade
Start your project by knowing how to prepare ground for a patio correctly.
Remove grass, roots, topsoil, and loose organic material throughout the marked area. Topsoil is not a structural base. It decomposes and compresses over time, leaving low spots in the patio.
For a small patio, a flat shovel, spade, wheelbarrow, and rented plate compactor may be enough. Larger areas can justify renting a skid steer or hiring out the excavation. As you dig, check depth and slope repeatedly with your string lines and a tape measure. It is much easier to correct a high or low spot now than after several tons of stone are in place.
Once the excavation is complete, compact the exposed soil, called the subgrade. If the soil feels soft, pumps underfoot, or stays muddy after normal rain, stop and address drainage before continuing. Adding stone over saturated soil does not solve the underlying problem.
In stable, well-draining soil, a geotextile separation fabric can be useful between the subgrade and stone base. It helps keep clay and fine soil particles from mixing into the crushed stone. It is not always necessary in sandy or gravelly soil, and it should not be confused with lightweight landscape fabric, which can tear and deteriorate under a patio.

Build the Base in Thin, Compacted Lifts
This is where long-lasting patios are made. Use a dense-graded crushed stone, often sold as road base, paver base, or crusher run. The mix should include angular stones and fines that lock together when compacted. Round pea gravel does not compact into a stable base and is not a substitute.
The process of how to prepare ground for a patio requires precision.
Add base material in lifts no deeper than 2 to 3 inches at a time. Rake each lift roughly to grade, lightly mist it if the material is bone dry, and compact it with a plate compactor. Repeat until you reach the planned base thickness.
It can be tempting to dump all the stone in at once to save time. Avoid that shortcut. A compactor works from the top down and cannot properly densify a thick layer. The result may feel firm initially but settle unevenly later.
Check the slope after every couple of lifts. Keep the base smooth and consistent, but do not chase perfect level. The slope you established at the beginning should remain through the base, bedding layer, and finished patio surface.
Add the Finish Layer for Your Patio Material
To achieve a durable patio, comprehending how to prepare ground for a patio is vital.
Paver patios need a thin, even bedding layer over the compacted base. Many installers use concrete sand, while others use manufactured bedding sand recommended by the paver manufacturer. Spread about 1 inch, then screed it flat with a straight board pulled across guide rails. Do not compact or walk across the screeded sand more than necessary before setting pavers.
Set pavers from a straight, stable edge and work outward, placing them directly onto the bedding layer without dragging them through the sand. Install edge restraints around the perimeter, then sweep polymeric sand or jointing sand into the joints according to the product directions. Compacting the finished pavers helps settle them into the bedding layer and lock the joints.
Finally, mastering how to prepare ground for a patio ensures longevity.
For a concrete slab, install forms at the final height and slope, then reinforce and pour according to your local requirements. Concrete needs control joints to manage cracking, and it needs proper curing. A well-prepared base reduces movement, but no concrete slab is guaranteed never to crack.
With flagstone, dry-fit pieces first and maintain joint widths that look intentional rather than random. The irregular shapes are part of flagstone’s appeal, but they also make it harder to maintain a smooth surface and consistent drainage. Take extra time here, especially around door thresholds and transitions to walkways.
For flagstone, knowing how to prepare ground for a patio will enhance aesthetics and function.
Avoid the Ground Prep Mistakes That Cause Patio Problems
Understanding how to prepare ground for a patio helps prevent common mistakes.
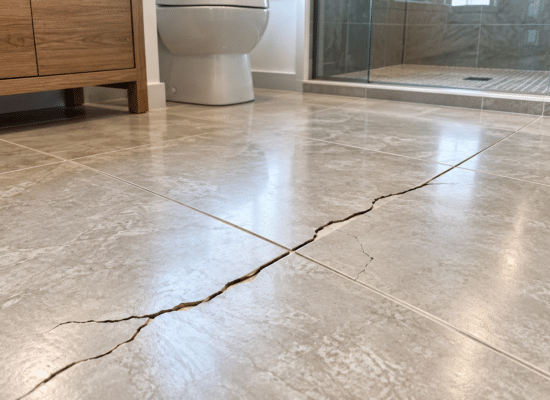
Most patio failures are not caused by the visible surface material. They come from skipped compaction, insufficient excavation, poor edge support, or drainage that directs water toward the home.
Do not lay pavers directly on dirt, even if the soil seems hard and dry. Do not use sand alone as a deep base. And do not bury the finished patio below nearby lawn grade, where runoff and mulch will collect across the surface.
A reliable foundation starts with knowing how to prepare ground for a patio.
If your yard has expansive clay, a high water table, significant tree roots, or a slope that requires cutting deeply into the grade, the project may need a different approach. A French drain, retaining wall, thicker engineered base, or professional site assessment can cost more upfront but may prevent a much more expensive redo.
A patio is only as stable as the layers below it. Take the time to establish drainage, compact every lift, and check your measurements often. When the ground is prepared correctly, the final surface becomes the enjoyable part of the project – not the beginning of a recurring repair.
In conclusion, the best results come from learning how to prepare ground for a patio thoroughly.