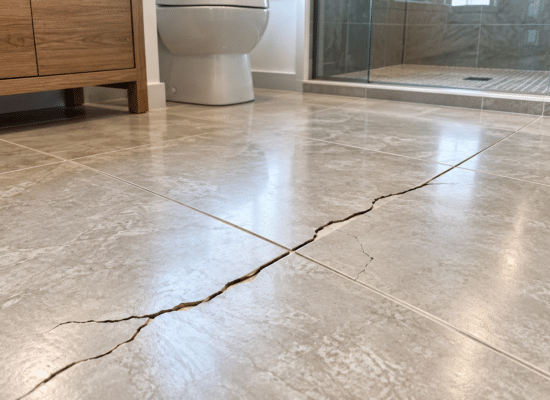




A driveway crack that is only wide enough to catch the edge of a key can still become an expensive problem. Water works into the opening, freezes in cold climates, loosens material below the surface, and gives weeds a place to grow. Learning how to seal driveway cracks early is one of the most budget-friendly ways to protect both asphalt and concrete – but the right repair depends on what your driveway is made of and why it cracked.
Table Of Content
- First, identify your driveway surface
- What you need to seal driveway cracks
- Step 1: Choose a dry, mild workday
- Step 2: Clean deeper than the surface
- Step 3: Prepare wide cracks before filling
- Step 4: Apply the right filler slowly
- Step 5: Let the repair cure before using the driveway
- When sealing is not enough
- Keep small cracks from becoming a replacement project
Understanding how to seal driveway cracks can save you money and time in the long run. When you learn how to seal driveway cracks, you’re taking the first step toward maintaining your driveway.
This is a manageable weekend project for many homeowners. The key is not simply squeezing filler into a crack. Good results come from cleaning the opening thoroughly, choosing a compatible repair material, and working in weather that gives the product time to cure.
By taking the time to learn how to seal driveway cracks, you can ensure a longer lifespan for your driveway.
First, identify your driveway surface
Asphalt is dark, flexible, and usually has a slightly gritty texture. It moves with seasonal temperature changes, so it needs flexible crack filler rather than a rigid cement patch. Concrete is light gray and hard, often divided into large slabs by deliberate control joints. It requires a concrete-compatible sealant or repair compound.
When considering how to seal driveway cracks, it’s important to remember the material you are working with.
The repair materials are not interchangeable. Asphalt crack filler may not bond correctly to concrete, while a stiff concrete repair product can pop out of an asphalt crack as the pavement expands and contracts. Check the label before buying, especially if your driveway has an older coating that makes the surface material harder to identify.
Also look at the crack itself. Narrow, stable cracks are ideal candidates for DIY sealing. A crack that is wider than about 1/2 inch, has crumbling edges, or shows one side sitting higher than the other may point to base failure, settlement, or frost heave. Sealing can keep water out temporarily, but it will not correct movement below the driveway.
What you need to seal driveway cracks
For a typical repair, gather a stiff wire brush, broom, shop vacuum or leaf blower, garden hose, utility knife, gloves, and eye protection. Your filler choice depends on the surface and crack size.
For asphalt, homeowners usually use pourable crack filler for small cracks and a thicker trowel-grade asphalt patch or crack sealant for wider openings. Some products come in tubes for a standard caulk gun, which gives you more control along thin cracks.
For concrete, use a self-leveling concrete crack sealant for horizontal cracks that are narrow and reasonably even. For cracks with a wider gap or chipped edges, a flexible polyurethane sealant paired with foam backer rod is often a better choice. Backer rod is a compressible foam rope placed deep in a crack so you do not waste sealant filling the entire void.
Using a flexible sealant is crucial when you want to know how to seal driveway cracks effectively.
Avoid buying a large tub of product before measuring the total length and average width of the cracks. A few hairline cracks may need only one tube, while a long network of driveway cracks can justify a larger pourable container. Leftover material often has a limited shelf life once opened.
Step 1: Choose a dry, mild workday
Knowing how to seal driveway cracks properly will prevent future damage and keep your driveway looking great.
Most crack fillers need a clean, dry surface and temperatures above roughly 50 degrees Fahrenheit, though exact requirements vary by product. Avoid working just before rain, during a heat wave, or when overnight temperatures will drop below the manufacturer’s recommended range.
Moisture is the biggest reason driveway crack repairs fail early. If you pressure-wash or hose down the driveway, allow the cracks to dry completely. On a shaded driveway, that may take longer than the surface appearance suggests.
For asphalt, do not seal cracks immediately after a fresh asphalt installation. New asphalt needs time to cure and release oils, often several months to a year depending on the installer and local conditions. Applying sealant too soon can interfere with that process.
Step 2: Clean deeper than the surface
Start by pulling weeds from the crack and scraping out packed soil, loose asphalt, old failing filler, and stones. A flathead screwdriver or narrow tool can help loosen debris, but take care not to widen a sound crack just to make the job easier.
Use a wire brush to scrub the crack walls, then vacuum the debris. A shop vacuum is especially helpful because loose grit at the bottom can keep filler from adhering. If you use a leaf blower, wear eye protection and direct debris away from cars, windows, and landscaping.
Being thorough in this preparation is key to learning how to seal driveway cracks successfully.
This preparation takes more time than applying the filler, and it is worth it. A clean, dry crack gives the sealant a solid surface to grip instead of leaving it attached to dust and crumbling pavement.
Step 3: Prepare wide cracks before filling
If you’re not sure how to seal driveway cracks, consulting with experts can also provide valuable insights.
Cracks wider than about 1/4 inch usually need more than a thin bead of sealant. On concrete, insert backer rod so it sits below the surface, leaving room for a sealant layer above it. The goal is to create an hourglass-shaped sealant joint that can flex instead of a deep, solid plug that may tear.
Choose backer rod slightly wider than the crack so it stays in place. Press it down with a blunt tool, not a sharp screwdriver that could puncture the foam. For very deep or badly eroded asphalt cracks, follow the filler manufacturer’s guidance on whether to use sand or a patching material as a base.
If the edges of an asphalt crack are breaking apart, brush away everything loose first. A crack filler can bridge a small rough edge, but it cannot stabilize pavement that has turned soft or crumbly. That area may need an asphalt patch before you seal the surrounding cracks.
Step 4: Apply the right filler slowly
It’s important to apply the right filler when learning how to seal driveway cracks for the best results.
For narrow asphalt cracks, pour or gun the filler into the opening in a steady line. Slightly overfill it, then use a putty knife or trowel to press the material down and level it with the driveway. Do not leave a tall ridge that tires, shovels, and foot traffic will catch.
For concrete, cut the tube nozzle to match the crack width and apply sealant slowly from one end to the other. Self-leveling products spread on their own, so use them only on level, horizontal surfaces and avoid overfilling. If the crack slopes, a non-sag polyurethane sealant is easier to control.
Work in shorter sections if you are new to caulking. It is easier to correct a three-foot section while the material is wet than to fix a messy 30-foot bead after it begins to skin over.
Step 5: Let the repair cure before using the driveway
Knowing the precise time it takes to cure is part of understanding how to seal driveway cracks properly.
Cure time varies widely. Some driveway crack fillers tolerate light foot traffic within a few hours, while vehicle traffic may need to wait 24 hours or longer. Hot, humid, cold, or damp weather can extend that schedule.
Keep cars, bikes, lawn equipment, and pets off the repaired areas until the label says the product is ready. If leaves or debris blow onto wet filler, resist the urge to pick them out repeatedly. Let the material set, then trim or clean minor imperfections if the product instructions allow it.
After curing, remember that the way you maintain the area will determine how effective your efforts in how to seal driveway cracks were.
If you plan to apply an asphalt driveway sealer, repair cracks first and let them cure fully. Most homeowners get better-looking results by sealing cracks on one dry day and applying a full asphalt coating later, rather than rushing both tasks together. Concrete does not need a blacktop-style coating, but a compatible penetrating sealer can help limit water absorption after crack repairs cure.
When sealing is not enough
Recognizing when sealing is not enough is also essential for those learning how to seal driveway cracks.
A few recurring cracks are normal in an aging driveway. But certain warning signs call for a closer look before you spend money on more filler: cracks that reopen quickly, a sunken area where water ponds, alligator-style cracking in asphalt, or concrete slabs that have shifted vertically.
Alligator cracking – a cluster of small interconnected cracks resembling reptile skin – usually means the asphalt base has failed. Surface sealant may improve appearance for a short time, but a proper repair often involves cutting out the damaged section and rebuilding the base. Likewise, a concrete slab that has lifted or dropped can create a trip hazard and may need leveling, drainage work, or professional evaluation.
Drainage matters just as much as the filler. If downspouts discharge beside the driveway or water consistently runs toward a low area, the crack repair may keep failing because the underlying soil stays wet. Extending a downspout, correcting a nearby grade issue, or redirecting runoff can protect the repair and the driveway structure beneath it.
Keep small cracks from becoming a replacement project
Regular inspections are key to mastering how to seal driveway cracks before they worsen.
Inspect the driveway each spring and fall, particularly after freeze-thaw weather. Pull weeds promptly, sweep away soil that collects in cracks, and repair new openings while they are still narrow. Asphalt benefits from periodic surface sealing when the pavement is in otherwise good condition; concrete benefits from keeping joints, cracks, and drainage under control.
A carefully sealed crack will still be visible, and that is fine. The real win is stopping water from using that small opening as a path beneath your driveway. A few hours of practical maintenance now can preserve a safer, cleaner-looking entrance to your home and delay the much larger cost of replacement.
Ultimately, knowing how to seal driveway cracks will offer peace of mind and enhance your home’s curb appeal.