
A cabinet repaint can make a dated kitchen feel newly designed for a fraction of a full remodel, but only if the finish survives daily hands, heat, grease, and cleaning. Learning how to paint kitchen cabinets is less about putting color on doors and more about preparing every surface so the paint has something solid to hold onto. Understanding how to paint kitchen cabinets effectively can lead to a stunning transformation.
Table Of Content
- Decide Whether Your Cabinets Are Good Paint Candidates
- What It Costs to Paint Kitchen Cabinets Yourself
- Gather the Right Cabinet-Painting Supplies
- How to Paint Kitchen Cabinets Step by Step
- Remove and label doors, drawers, and hardware
- Clean away grease before sanding
- Sand for adhesion, not bare wood
- Prime every surface that will be painted
- Apply thin coats of cabinet enamel
- Let the Paint Cure Before Reassembly
- Common Mistakes That Shorten the Life of Painted Cabinets
For most homeowners, this is a realistic DIY project. Plan for a long weekend at minimum, plus drying and curing time, and be honest about the cabinet condition before buying supplies. Paint can transform sound wood, MDF, and many laminate cabinets. It cannot correct swollen particleboard, peeling thermofoil, loose hinges, or doors that no longer close properly.
This guide on how to paint kitchen cabinets will walk you through the process step by step, ensuring a professional finish.
Decide Whether Your Cabinets Are Good Paint Candidates
Start with a close inspection. Open every door, check the lower sink cabinet for water damage, and look along the edges of doors and drawer fronts. Small dents, old hardware holes, and surface scratches are normal paint-prep work. Soft spots, delaminating veneer, or extensive cabinet-box damage may mean repair or replacement should come first.
Solid wood cabinets are the most forgiving. Painted MDF cabinet doors can also look excellent, though exposed MDF edges need careful sealing. Laminate cabinets can be painted if the laminate is firmly attached and thoroughly scuff-sanded, but they need a bonding primer. Thermofoil cabinets are the riskiest candidate: once the vinyl coating is lifting, paint will not make it reliably adhere again.
A repaint is also an opportunity to decide whether your current layout still works. If you plan to move walls, replace countertops, or change appliance locations within the next year, wait on the cabinet paint. It is frustrating to complete a careful finish only to cut into it for a larger renovation.
What It Costs to Paint Kitchen Cabinets Yourself
When considering this project, remember the essential steps in how to paint kitchen cabinets to ensure longevity and durability.
DIY costs depend largely on the size of the kitchen and whether you already own basic tools. A small kitchen may require $200 to $400 in primer, cabinet paint, sandpaper, cleaning supplies, rollers, brushes, plastic sheeting, and painter’s tape. A larger kitchen or one needing a paint sprayer, new hardware, wood filler, and multiple paint colors can run $500 to $1,000 or more.
Hiring a professional commonly costs several thousand dollars, with pricing driven by the number of doors and drawers, prep needs, local labor rates, and whether the contractor sprays the finish in place or off-site. The DIY savings can be significant, but prep is where the labor lives. Do not choose this project because it sounds like a one-day shortcut.
Gather the Right Cabinet-Painting Supplies
Gathering the right materials is crucial for success. Here’s what you need for how to paint kitchen cabinets effectively.
Cabinet-specific products reduce the chance of a soft, streaky, or easily chipped finish. Interior wall paint is usually not the right choice for kitchen cabinets.
You will need:
- A degreasing cleaner and clean rags or scrub pads
- Screwdrivers, labeled bags, and a simple labeling system for doors and hardware
- Wood filler or two-part filler for dents and old hardware holes
- Sandpaper in roughly 120-, 180-, and 220-grit ranges, plus a sanding block or orbital sander
- A high-adhesion or stain-blocking primer suited to your cabinet material
- Cabinet, trim, or furniture enamel in your chosen sheen
- High-density foam mini rollers, quality angled brushes, and paint trays
- Drop cloths, plastic sheeting, painter’s tape, and a vacuum with a brush attachment
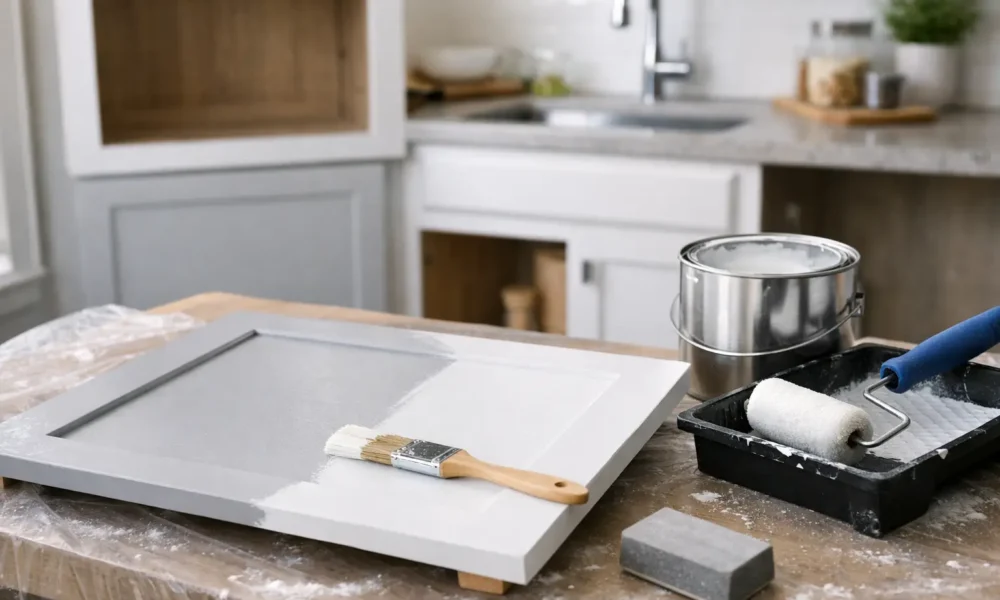
A paint sprayer can produce a near-factory finish on doors and drawers, but it adds setup, masking, overspray, and cleaning. For a first-time DIYer, a foam roller followed by light brush work is slower but easier to control. If you spray, practice on cardboard or scrap wood before touching a cabinet door.
How to Paint Kitchen Cabinets Step by Step
Follow these steps carefully to master how to paint kitchen cabinets like a pro.
Remove and label doors, drawers, and hardware
Take doors off their hinges and remove drawer fronts when possible. Put each hinge, screw, and hardware set in a labeled bag that matches its door or drawer. Number the inside of every door and its corresponding cabinet opening with low-tack tape or a small pencil mark in a hidden location.
This small step saves time later, especially in older homes where hinges and doors have settled into specific positions. Remove knobs and pulls rather than painting around them. If you are changing hardware sizes, fill old holes before sanding and drill new holes only after the paint has cured.
Clean away grease before sanding
Kitchen cabinet surfaces hold more grease than they appear to, particularly near the range, trash pullout, and handles. Wash every door, drawer front, frame, and cabinet box with a degreaser, then wipe again with clean water if the product directions call for it. Let the surfaces dry fully.
Skipping this step is one of the main reasons fresh paint peels. Sanding over grease can work the residue into tiny scratches instead of removing it.
Sand for adhesion, not bare wood
Understanding the process of how to paint kitchen cabinets will ensure a smooth application.
Your goal is to dull the existing sheen and smooth damaged areas, not strip every cabinet to raw wood. Use 120- or 150-grit paper on glossy surfaces, then move to 180 grit to even things out. Sand filled spots flush, and lightly round any sharp paint edges that could show through the new finish.
Vacuum the dust, then wipe surfaces with a clean, lint-free cloth. Fine dust can leave gritty paint and make doors feel rough even after several coats. Use proper ventilation and wear a dust mask, especially if you are working in an older home with unknown existing finishes.
Prime every surface that will be painted
Priming is a critical step in how to paint kitchen cabinets. It prepares the surface for the best adhesion.
Primer is the bridge between your cabinet material and the finish coat. Use a bonding primer for laminate or glossy factory finishes. Use a stain-blocking primer for wood cabinets with knots, tannin bleed, smoke staining, or water marks. If your cabinets are very dark and you are painting them white or light gray, tinted primer can help reduce the number of finish coats.
Apply a thin, even coat. On broad, flat areas, roll the primer and lightly smooth it with the roller before it begins to set. Use an angled brush for profiles, corners, and frame details. Once dry, sand very lightly with 220 grit, remove dust, and inspect for flaws that primer made easier to see.
Apply thin coats of cabinet enamel
Applying the right type of enamel is essential in learning how to paint kitchen cabinets that last.
Use a durable cabinet enamel, urethane-modified alkyd paint, or other coating specifically labeled for cabinets, trim, or furniture. Satin and semi-gloss are the most practical sheens. Satin disguises small imperfections better, while semi-gloss is easier to wipe clean and gives a more reflective finish.
Apply two thin coats rather than one heavy one. Heavy coats are more likely to sag along door edges, pool in routed details, and cure soft. Follow the can’s recoat time exactly. Temperature and humidity matter: painting in a cold garage or a humid basement can dramatically slow drying.
For the smoothest result, lightly sand between coats with 220-grit paper after the first coat is completely dry. Do not sand aggressively. You are only removing dust nibs and tiny roller texture before the final coat.
Let the Paint Cure Before Reassembly
Remember, the curing process is just as important as the application in how to paint kitchen cabinets.
Dry paint is not necessarily cured paint. Many cabinet coatings feel dry within hours but need days or weeks to reach their full hardness. Check the paint label, then wait as long as practical before reinstalling doors, tightening hardware, or loading shelves.
Set painted doors on painter’s pyramids, drying racks, or clean blocks so edges do not stick to the work surface. Avoid stacking freshly painted doors face-to-face. When reassembling, adjust hinges slowly and do not force a door that rubs the frame, since that can chip a new finish.
For the first few weeks, clean gently with a soft damp cloth and mild soap. Avoid abrasive scrubbers, harsh degreasers, and slamming doors. Once fully cured, a quality cabinet finish should handle normal kitchen life well.
Common Mistakes That Shorten the Life of Painted Cabinets
By avoiding common mistakes, you can improve your skills in how to paint kitchen cabinets effectively.
The fastest way to a disappointing finish is rushing the invisible work. Painting over grease, skipping primer on slick laminate, applying thick coats, and reinstalling doors too soon all lead to chips and sticking. Another common issue is choosing a trendy color without testing it under the kitchen’s actual lighting.
Paint sample boards or the back of a spare door first. View the color in morning light, at night, and alongside your countertop, backsplash, and flooring. Warm whites can look yellow next to cool gray counters, while deep navy or black may make a small kitchen feel polished but can show fingerprints and dust more readily.
If your cabinet boxes are in good shape but your doors have heavy profile damage or warped panels, consider replacing only the doors and painting the boxes to match. It costs more than repainting alone, but it can be a smarter middle ground than a full cabinet replacement.
A well-painted kitchen does not need to look like a budget compromise. Give the prep the time it deserves, use coatings made for hardworking surfaces, and let the finish cure before your kitchen returns to full service. That patience is what turns a fresh color into an upgrade you can enjoy every day.
Ultimately, patience is key in mastering how to paint kitchen cabinets and achieving that perfect finish.